Showing posts with label invitation. Show all posts

Wednesday, January 18, 2012

RE-ceiving Guests: Madeline Kids Party


 THE THEME & INSPIRATION
Madeline is an AMAZING series of children's stories by Ludwig  Bemelmans about the adventures of a little girl in Paris living in a boarding school run by nuns.  My daughter really liked Madeline when she was 2 so that year we threw her a Madeline birthday party.   She is pictured above in her Madeline costume in front of a poster board display I made for the party.  The blue coat and hat are part of an official Madeline costume I bought online several years ago from a store. If you want one, currently several  costume versions are for sale on ebay.  My SIL, Yvonne, made my daughter the yellow dress as a birthday gift because the coat was itchy and my daughter didn't like wearing it without something underneath.
THE INVITATION

The Madeline books and the Madeline tv specials all begin with the same lines, "In an old house in Paris that was covered with vines, lived twelve little girls in two straight lines.  In two straight lines they broke their bread and brushed their teeth and went to bed. They left the house at half past nine  In two straight lines in rain or shine- the smallest one was Madeline."  I decided to alter the rhyme for the invitation, and as we did for our daughter's Peter Rabbit Birthday Party, we took her picture with a doll of the theme to use in the party invitation. 
Front outside of the invitation. I bought personalized Madeline stickers on ebay and used them for the invitation return address, thank you notes and for the favors. 

Back of the invitation above.  Madeline is not as popular as other children's characters so finding her party supplies takes a little more effort.  I found the invitations, thank you notes, a birthday banner, balloons, blow toys, party hats, plates, plastic cups, and stickers like the one above that I used to seal the invitations online. The stickers sheets were put in the plastic cups with the blow toys as favors along with some candy.
Using Available Resources.  There was a French Antique shop in Austin that had a large Eiffel Tower statue in front of it and I took my daughter to take pictures there.  I considered using these pictures for the invitations, but felt the close up ones were better since I already had the pre-made invitations.  If I had printed my own, then I probably would have used an image like this one for it somehow.  Still I like the pictures we took there.  Sometimes ideas work out, sometimes they don't.  But, I think it is good to see them as part of a creative process which is what I enjoy about entertaining.

DECORATIONS
Making Decorations:  I only had a few mylar Madeline balloons so I bought a lot of blue and yellow balloons to make the party more festive. I also bought poster boards and drew pictures of Madeline, Miss Clavel (the nun who runs Madeline's school) and Pepito, the Spanish boy next door and Madeline's friend. I also used a box to represent Madeline's boarding school.  My parents gave us a large pinata in the shape of The Eiffel Tower since Madeline lives in Paris.   A friend of ours who is into photography very generously took many pictures at the party and shared them with us.  If any of the pictures look good, chances are they are his.  If you don't like the photo, most likely I took it.  Above Photo credit: Leon Little.

Home made Decoration.  This is my Madeline board.  It may seem intimidating at first to make your own decorations, but I have very basic artistic skills and I was able to copy the characters fairly well.  Many children's stories feature characters that are fairly easy to draw.  I got the boards at Office Depot and used latex paints to color them in. 
An old house in Paris that was covered with vines.  I covered a large cardboard box with maroon poster paper that I bought at a Teacher's Supply store.  The roof is made of gray poster paper I got at the same time.  The door and steps are made from regular construction paper and the hinges and handle are painted on with permanent marker.  Around the holes I cut out for windows, I placed extra pieces of cardboard I painted gray and drew slats on with black marker to represent shutters.  I used a green marker to make planters in front of the house and I cut out little pieces of green construction paper to glue on as vine leaves.  There was probably an easier way to do this, but I was very excited about this party for months beforehand so I never thought twice about the time it would take to make a project for it.  
Standing Poster board.  I chose a large standing poster board for Miss Clavel and Pepito because I wanted to cut out their faces and use heavy duty tape to support a hinge/door effect so people could poke their heads in and take pictures that way.   I helped support the board by cutting out another large piece of cardboard and sticking it in the back as a stand also using heavy duty tape to attach it.
My husband and daughter goofing around with the cutouts as we are setting up for the party.  I was hoping they wouldn't be the only ones to use the cutouts.
I was so happy to see guests got into the spirit and posed with the cutouts.
So fun.  I used the poster board cutout again the next year for my daughter's Dora birthday party.   I just painted on the other side.  Cut outs invite guests to be silly and smile and that was the mood I was going for.
In this photo, you can see a little of the back part of the cutout stand and how I used another piece of cardboard to support it.

ENTERTAINMENT

For kids this young, I thought it was important to keep the activities easy.  I hired a petting zoo that bought small farm animals to my front yard.  The kids LOVED it.
Seriously, look at those smiles?
I like how his tongue is sticking out.  Pony riding takes some concentration. LOL.
The kids roamed around with the animals on leases, too. 

Adorable, right?  I have a LOT of pictures of the kids with the animals. They make for great photo ops.  If you don't want to hire a petting zoo, most zoos allow kids' parties in their petting zoos or you could just get some friends to bring  2 or 3 small animals to your home for the kids to check out.  Bunnies, baby chicks, baby pigs, even kittens and puppies are all going to enchant kids and adults alike and make fantastic photo subjects.
I mean look at that smile.
One more pic because I was so happy with how entertained everyone, including the adults, were by the petting zoo.
The Eiffel Tower Pinata my parents gave us was gorgeous.  I was a bit sad to destroy it.
The kids weren't sad about it though.  They all enjoyed taking their turns hitting the pinata.  My daughter above is adjusting her hat to hit it again.
FOOD AND DRINK

Since Madeline is French, to keep the theme we offered French champagne and/or champagne mimosas to the adults. The indoor food table had ham and cheese filled croissants, strawberries and a spinach quiche.   Outside, we had a large tub full of water bottles, bottled French lemonade and ice beside an open container of chilled pink lemonade punch.
On the outside table, I also set out a plate of pate beside a plate of baguette slices for people to nibble on. 
Sorry, I don't have any more pictures of the menu to share.  Above you can see one of the guests, enjoying a plate of the party food.
I had seen a Madeline hat birthday cake made from two round cakes (use cake mixes to make two 9- inch cakes and cut the top one back to be smaller, like only 6 inches in diameter) stacked one on top of the other, frosted with yellow icing with a red ribbon made from Fruit roll up online that I thought was adorable. I showed it to my SIL, Yvonne and she suggested she could make it, but she was very busy around that time so I decided to have my parents bring up a Madeline themed cupcake cake from our hometown baker for the party.  The morning of the party, Yvonne showed up with the Madeline hat birthday cake.  Yvonne explained that was some mistake/issue with icing it, but it still turned out super cute, imo.  We used that as the main cake and the cupcake cake as the backup.  If you are interested in making one, I think the original article I saw was this Family Fun one HERE
The cupcake cake.  Sorry, we didn't take a picture before the kids starting digging in for cake.  This gives you the gist though.  For younger kids, cupcake cakes can be really nice because the portions are small and the kids can eat them on their own even as young as two. 

There will be a mess after the cake, of course, but that is part of the fun with kids this young.
FAVORS

Balls are a great favor for small kids.  I found Madeline balls and gave one to each of the kids who attended the party.  They played with them a bit at the party and my daughter still has hers.  I also gave out plastic Madeline cups with candy, stickers, some Madeline coloring pages I found online, crayons and those trinkets they sell at party stores, but honestly I think the balls were the big hit favor.  My friend, Martha, gave her daughter a ball and bubble party about this age with lots of balls for the kids and different types of bubbles and I am sure it was a big hit.  Kids this young cannot do complicated activities so keeping planned activities simple works best I think.
If you are planning a Madeline party and want some info, please leave a comment and I will be glad to offer whatever help I can.  Actually all feedback is very much appreciated.

WRITTEN BY ELDAROSE

PETER RABBIT BIRTHDAY PARTY & EASTER KIDS PARTY IDEAS ARE HERE

DORA THE EXPLORER BIRTHDAY PARTY DISCUSSED HERE


Stuff and Nonsense
;


;
See more Tablescapes HERE


Tuesday, January 10, 2012

RE-ceiving Guests: Peter Rabbit Pty & Easter Playdate

FIRST BIRTHDAY:  For our daughter's 1st birthday we chose a Peter Rabbit theme.   As a new parent, I wanted to make things easy on me but still cute for the guests so I ordered the cake from a local bakery.  I think they did a great job decorating the cake.  It was half carrot cake, half white cake.

HOW SWEET IT IS.  Our daughter ate cake with her hands and took some cute pics and that is all I hoped for. The First Birthday party is more about adult guests since children that young cannot do much and will not even remember the party.  Our entertainment was a bubble machine.  That's it.  I had a pinata for the older kids to hit, but the weather didn't cooperate.  It rained the whole day so the pinata was saved for another time.
The Theme came about because I saw a Peter Rabbit party book in a book store.  It had cut outs to tie to make a banner and make little party hats for the guests.  I decided to use some of the cut outs to tie with ribbon and hang from the chandelier over our dining room table that would have the buffet for the party.  I used other cut outs on the table. I also copied images online to make labels I put next to different dishes to claim them as part of a theme. For example, next to the veggie platter, I put a sign saying Vegetables from Mr. McGreggor's Garden.   I couldn't find the book I originally used for this post, but Amazon does have a similar Peter Rabbit book. HERE

THE INVITE. This was the biggest project I did for the party.  We took pictures of our daughter with a Peter Rabbit doll we bought and some veggies.  Then I used the picture to make the birthday party invitations.  My mom still had her party invitation saved so Reba scanned it for me to post.  The scan wasn't done level and  I know the picture is not the best quality but if  you can tell that the invitation has a vellum overlay and it is cut out in the shape of the number "1" then that is all that matters.  We also used our daughter's photo for her Madeline birthday invite, you can see HERE.
INVITATION CRAFT:  To make the party invitations, you will need white card stock, vellum paper, scissors, a hole punch, a scanner, ribbon and white envelopes.  First, I scanned in our daughter's portrait and printed out 2 images to a regular sheet of paper.  I printed out sheets until I had enough to make all the invitations.  Second, I free hand drew a large number "1" as you can see above.  I experimented to both center it and make it large enough so the number captured all the good parts of the photo.  When I did this, I then cut out the number to use as a template.  Third, I typed all the party info in a word document and printed it out on vellum paper.  Fourth, I used a sharpie and the template to draw 2 number "1" outlines on the vellum sheets over where the 2 photo images would be on the sheets I already printed.   Fifth, I worked altering the text centering and printing it on that same vellum page with the outline until the text was centered within the outlined numbers I had drawn on it.   Sixth, I printed out vellum sheets with the party info on them, drew the number "1" outlines and cut out them out.   Seventh, I attached the two sheets, cutting them out based upon the outline of the number "1". Last, I punched a hole in the 2 sheets (vellum and the photo) and tied a blue ribbon on top.  The process was a little bit of time and effort, but I got a lot of compliments on the invitation so it was worth it to me.  There may be an easier way to do it using the computer to draw the outline before printing, but with my limited techno-knowledge, that was how I did it.  

PARTY MENU

Vegetables from Mr. McGreggor's Garden (veggie tray with dips)
Mrs. Rabbit's Muffins & Breads (blueberry muffins & buns to make ham sandwiches)
Mopsy, Flopsy & Cottontail's berries (bowl of mixed berries)
Mrs. Rabbit's Ham (sliced ham with different mustards so people can make small sandwiches)

Mrs. Tittlemouse's cheese (platter with some gourmet cheese and sliced cheese for the sandwiches)
Mrs. Tiggy-Winkle's tea (iced)


If you notice, it is a cold menu. I didn't heat up anything to serve. I normally offer some hot dishes to guests, even when I want to keep things simple, but with a new baby, I put simplicity first.  I found some carrots at the grocery store that were uncut with stems and placed a few on the table as decorations. I placed Beatrix Potter dolls which my friend, Jana, lent me,  on doll chairs in the middle of the food table as a centerpiece.


BIG SMILES:   My husband and daughter pose for a picture in front of the mantel in our old house. You can see that I used more of  the large collection of Beatrix Potter dolls which my friend, Jana, lent me to set up a mantel display for the party.  I also bought a lot of blue, light blue and white balloons and relied upon the large Peter Rabbit Pinata for a festive party setting. My parents gave us the pinata.  They bought it from a man in our home town. They brought us one in the shape of the Eiffel Tower for our daughter's Madeline Birthday Party, too.  Unfortunately, it rained all during the party so we couldn't use it.  I had to save it for another time and my friend, Martha, suggested I use it for an Easter time playdate, which is what we did. 
FINALLY BREAKING THE PINATA:  My daughter is finally getting her chance to break open the pinata above.  I hosted a party in March (several months after my daughter's birthday) for the specific purpose of finally using the Peter Rabbit pinata.

SPRING AFTERNOON SNACKS.  I wanted to do something a bit fun for the Spring playdate so I set up my outdoor table with a nice, crisp white linen table cloth, used pink depression glass serving pieces I have and some Pottery Barn Easter Egg plates to set up a sweet table.  The moss standing Rabbit is something I bought at a local gift store and decided to use as the table centerpiece.By this time, stores were selling plastic Easter eggs, so I bought some iridescent ones and just threw them around the table and the yard.
ANOTHER VIEW OF THE TABLE. I bought cupcakes, cookies, a fruit tart and pink French lemonade for the play date.
FRESH STRAWBERRIES,ROQUEFORT GRAPES AND FINGER CHICKEN SALAD SANDWICHES ON DISPLAY.   I cut up strawberries and made chicken salad sandwiches and Roquetfort grapes.  You can find a chicken salad recipe for the sandwiches HERE.  The Roquefort grapes were for the moms. The kids wouldn't have liked them.  I like how Roquefort grapes mix the sweet taste of the chilled grapes and the strong flavors of the cheese and nuts.   If you have never tried them,  I am sharing how to make them here.  

ROQUEFORT GRAPES

1 package chopped walnuts
1 package light cream cheese 8 oz. 
1/8 lb. Roquefort cheese
2 tablespoons heavy whipping cream
1 package red grapes (seedless)

Before opening up the walnut package,  I usually hit it a few times to smush up the pieces even more. Then, I open the bag and put all the nuts in a bowl.  Also, I set up a platter or plate nearby to place the finished grapes. Let the cream cheese and the Roquefort cheese become room temperature.  You are going to combine them with the whipping cream, and the cream cheese blends more easily the longer it is out.  You add in the cream to help the cheese become moist enough to coat the grapes.  I normally just use a spoon to mix the cheese with the cream, but you could also use a food processor for this.  Once you have mixed the cheeses and the whipping cream, then you will take a clean, dry grape and put it in your hands.  You will grab some of the cheese mixture, too, and roll the grape into the cheese mixture until it is thoroughly coated. Then you will roll the cheese-covered grape in the bowl with the nuts to coat it.  Placed the now nut coated grapes on the platter/plate you set up nearby and after you fill the platter, put it in the refrigerator to chill for at least 45 minutes before serving.


CLOSE UP VIEW OF FOOD.
EVEN CLOSER VIEW OF STRAWBERRIES AND ROQUEFORT GRAPES.

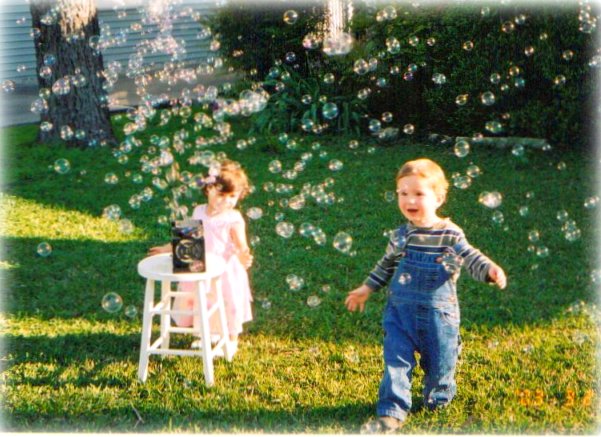
ENTERTAINMENT. For the playdate, I once again pulled out the bubble machine.  Seriously, the Bubble machine I bought was such a good investment. It kept the kids entertained long enough for the moms to sit down.
One more, because aren't they precious? Sigh. They grow up so fast.

WRITTEN BY ELDAROSE

Madeline or French themed Kids Party Ideas are  HERE


Dora the Explorer Party Ideas are HERE

LINK PARTIES:


;


Stuff and Nonsense
;


;
See more Tablescapes HERE


""/>