Showing posts with label Christmas. Show all posts

Tuesday, December 20, 2011

RE-decorating: Holiday lunch at Jean's house

This past week, I saw my college roommate, Jean at her home in Houston. Jean has been an incredible friend for many years. This last visit, she invited me and a college friend of ours, Angela, over for lunch at her home. It was a rare treat for the 3 of us to be together. Since college, the three of us have lived in three different cities in Texas and while we will see each other when we visit those cities, we seldom are all in the same city at the same time. We were joined for lunch by one of Jean's daughters and another visiting relative. We had a great time and I was able to shoot a few photos for the blog.Jean decorates her front door for Christmas with fruit, red and gold glass ornaments, a wreath and a poinsettia.


Jean sets a welcoming scene on her front porch by decorating her wood bench with Christmas patchwork pillows and a stuffed snowman doll.

Jean lives in a spacious home which she has decorated for the Christmas holiday.  Jean has many nativity scenes throughout her home including one I gave her years ago. She has a large tree in her foyer and another one in her family room. 

Jean's dining room is already set for Christmas dinner. She uses her Lenox Autumn wedding china on gold chargers, with matching linen napkins, Towle Old Master silverware and her Waterford Lismore crystal. Her floral center piece is in complementary shades of creams and light blues. Her place card holder is a red & green Christmas tree ball ornament. She uses Sabino crystal knife rests. I especially noticed how nice the china setting looks on the mahogany table without a tablecloth.

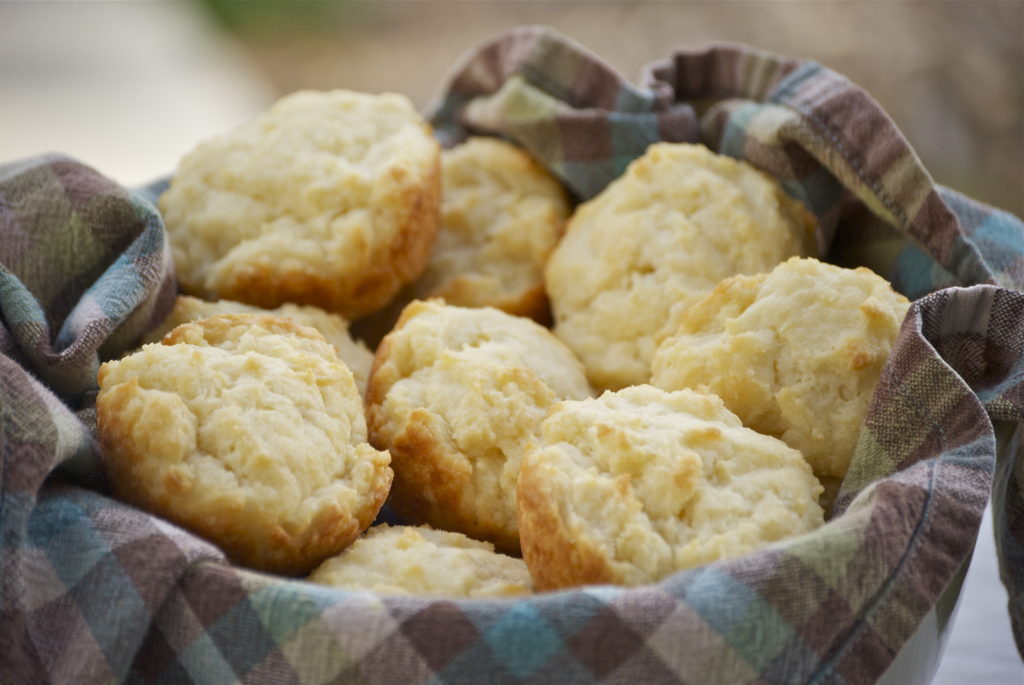
For the casual luncheon, we ate in the breakfast nook adjacent to the kitchen. Jean used a red table runner with Christmas appliques. She also used Spode Christmas tree pattern plates with a Santa Claus napkin holder on top of gold chargers. We had a delicious green salad for lunch with great orange rolls from a local bakery. She made the salad while we watched and chatted. We enjoyed a great, relaxing time. Old Friends are such a blessing! Jean shared an easy recipe for sour cream biscuits with me which I am sharing with you below

I didn't take a picture of Jean's biscuits so I googled and found Macaroniandcheesecake.com did almost the exact same recipe.  The image above is of their biscuits.  The only minor difference from Jean's recipe below is they cook their biscuits at 350 instead of 375.  Although, they also found a handy recipe to make a Bisquick substitute if you don't have any available.  The image above, their biscuit recipe and the Bisquick substitute recipe can be found HERE
JEAN'S SOUR CREAM BISCUITS RECIPE


2 sticks butter, room temperature
1 cup sour cream
2 cups Bisquick
Mix and drop into small muffin tins.  Bake @ 375 degrees for 15 minutes or until lightly browned.  Makes 4 dozen.

WRITTEN BY REBA


""/>


Sunday, December 18, 2011

RE-decorating: Martha's Christmas Home Tour


If you missed them, you can see Reba's Christmas Home Tour  HERE, our sister, Elsa's Christmas Home Tour HERE and my own Christmas Home Tour HERE.  Since Christmas is around the corner, I am really happy we could get in one more home tour before the big day, and I promise this one is full of eye candy.

TRADITIONAL, BUT ALWAYS WITH A TWIST:  My dear friend, Martha, allowed me to photograph her Christmas decor for the blog.  I am very happy about this because I am sure many of you will enjoy seeing her decor.  Martha's Christmas decor is like she is: colorful, bright, fun, unique, charming with a warm, inviting vibe.  She likes traditional style, but she always does something to it to make it brighter and more fun.  Her living room mantel is a perfect example. The center art piece is traditional red & green, but she found decorative picks with red, green, turquoise, silver, yellow, & blue reflective confetti to add more color to the setting. She filled brass based glass containers with bright ball ornaments in these colors and used the picks as burst of color on the top.  Once multicolored lights are added to the mantel's garland as well, visitors are sent a strong first message that this is a festive home.  Martha has a relaxed approach to decorating.  She uses whatever looks good to her.  The stockings are not all the same. Some people might change out the stockings to be the same for a so-called "designer" look but Martha avoids uniformity.  There is a story behind the stockings not matching and Martha will be glad to share it.
NOTHING MEEK ABOUT THIS CHRISTMAS DECOR:  Martha is vivacious and creative and so is her Christmas decor. 
SNOW GLOBE COLLECTION:  Martha collects snow globes and she puts out a large assortment of them on a table in her living room.

FORMAL & JUVENILE TOGETHER? WHY NOT?  This is a family home, not a museum.  A very nice traditional snow globe can sit right next to a brightly painted juvenile one from the Dollar Store.  Again, no stuffy decorating rules here.

JOYFUL DINING:  Purple walls, green chairs with a red, green and gold table setting.   I had dinner in here last week when Martha hosted our Bunco club for dinner and it was a fantastic setting.  Unfortunately, I forgot my camera that night so I took these pictures right before Martha was hosting a kids' party.  Martha is going to set her table again this week so I promise to update this entry with pics of her table set with her Christmas china.  It looked FAN-TASTIC all combined so don't forget to come back to see them.  You won't want to miss it.
USING WHAT YOU HAVE:  As I sat at dinner, I was fascinated by Martha's centerpiece.  I don't know where she got the inspiration, but it all worked. She told me she went shopping around her Xmas tubs for stuff to use and borrowed the candlesticks from her mother. 
BRASS CANDLESTICKS? YES. Unless you are doing an older historic home and trying to maintain the period, I think most people would say that brass candlesticks are "out", well, they may not be trendy, but they were FABULOUS in Martha's Xmas tablescape. I sat there thinking "This is really gorgeous, all pulled together.  She used old brass candlesticks, but nothing about them feels dated here. They seem old-world, even a bit rustic, the way pine cones sometimes feel.  It is a visual contrast to all the glittery and shiny modern stuff.  Where did she get this cool idea? I even love the long runner shape of the centerpiece. It works with the table and the room."  Martha likes contrast, but it is her good eye for color and scale, that allows her to blend in so many different elements

THE HEART OF HER HOME:  They say the kitchen is the heart of the home, and it is definitely true in Martha's house.  Martha is a good cook and during parties, people always gather in her gorgeous, predominantly white kitchen. It has high ceilings and a large center island with a lower section which can serve for kitchen dining if wanted.   For Christmas, Martha put large red & white striped ribbons on her industrial pendants. So cheerful, right?  For the kids' party, Martha was making warm cider, put out a bowl of popcorn and was preparing water as a sugarless, healthy drink to offset the sugar overload at the cookie buffet table.

RED & WHITE:  In addition to the red & white striped ribbons on the industrial pendants, she put out red candlesticks that look like toy soldiers with green candles on the mantel above her stove.
CLOSE UP RED & WHITE STRIPE RIBBON ON PENDANT:  A section of Martha's kitchen has white cabinets with white carrera marble, another section has blue cabinets with black granite and the center island has white cabinetry with butcher block counter top.  Even though the cabinets and counters change throughout the room, they all work together beautifully and the red and white stripe brings a holiday cheer that compliments the entire room.
ONE MORE PICTURE: just because I took it.

KITCHEN TABLE AKA COOKIELAND:  Martha put out a large assortment of baked treats for the guests on her red family room table.  The kitchen table is red year round.  Martha painted it that color and I am guessing it played a role in Martha picking the red & white ribbon for the room.  Martha has a modern light fixture over her kitchen table and she adorned it with garland and ribbon for Christmas.
CLOSE UP RIBBON:  Simple knots anchor the ribbon to the corners of the light fixture.

A FEAST:  This is the spread Martha put out for the kids party.  A HUGE assortment of cookies and baked goods.  She saw the assortment at Wal-Mart's bakery and it gave her the idea for the table.  She used simple white platters and plates to display all the brightly decorated baked goods.  To brighten up the table she added curled strips of ribbon and sprinkled peppermints between the platters.  Gold twine trees provide a focal point at one end.  
ANOTHER VIEW OF KITCHEN TABLE:  The kids certainly had a great selection of treats at the party.  When I commented on how much food she had for a relatively small group,  Martha agreed and said she "went a little crazy at the store and pulled an Eldarose" meaning she bought way more food than she probably needed.   Yes, I definitely tend to do that.  It drives my husband nuts because we always have too much food leftover.  By the way, I know you are noticing, yes, Martha has white and purple kitchen table chairs.  The room is always colorful and inviting.  She use to have a dark wood table and dark chairs in here and it didn't suit her personality as well.  The bright prints above the chairs and the big colors are more Martha's personality.
CLOSE UP OF PLATTER #1
CLOSE UP PLATTER #2

CLOSE UP OF HER GOLD TWINE TREES

THE CHRISTMAS TREE:  Martha put her Christmas tree in her family room this year off the kitchen.  She said she wasn't sure she liked it there, but I thought it worked great. 
SIDE VIEW

LOVE YOUR TREE:  Martha's tree doesn't have a particular theme.  It is bright and eclectic. She uses the same decorative picks with bright multi color reflective confetti from her mantel on her tree.  Because the picks have a lot of different colors, they help bridge all the various color schemes of the ornaments that otherwise would not match.

ALL SORTS OF ORNAMENTS:  Something great about an eclectic tree is that it never gets boring.  Whenever I stand beside Martha's tree, I notice a new ornament that I've never seen before and if I ask her about it, there is almost always a story that goes with it.
MARTHA'S CHRISTMAS TREE ART:  When I was taking pics, Martha said she had a craft for my blog and she asked me if I had noticed her Christmas tree art and I said "No, where is it?"  The funny thing is that it was hanging above her sofa in the living room where I had been seated for hours a few nights before at our Bunco Christmas party.   I had seen her Christmas tree art, but I had thought it was folk art she had purchased.

QUICKIE HOLIDAY DECORATING:  Martha had hung 2 blank canvases in gold frames above her sofa months ago, hoping for some inspiration to make them into a display.  She felt the wall over the sofa needed something more visually to fill the space, but she wasn't ready to buy a piece of art, so she thought she might be able to make something.  But, the canvases were left blank until the night of the Bunco party when she felt an urge to do something with them before guests arrived. So she grabbed several rolls of gift wrap, tore off pieces and pasted them to the canvas to make Christmas trees.
ANOTHER PICTURE OF THE QUICKIE DECORATING:   Firmly anti-banality, Martha didn't try to match the gift wrap colors or patterns. She chose an assortment to keep it fun and interesting. 
XMAS PILLOW:  Part of why I thought the Christmas trees were folk art pieces is because these are Martha's holiday pillows - 1 small angel pillow and a larger pillow with multiple ethnic prints and textures.  Some people might find the larger pillow a weird choice for a holiday pillow. While the pillow is not exactly traditional, the colors are repeated in other Christmas decor in her living room, plus here in Austin, keeping things a little weird and unexpected  is very very desirable.  

I hope you enjoyed Martha's joyful Christmas decorating.  I want to thank her for sharing her home on the blog.  *Waves to Martha*   As I said, I hope to take pictures of her dining room table set for dinner, so there should be more pictures to share soon.

WRITTEN BY ELDAROSE

P.S.  I just posted the recipe for the best pound cake ever. Seriously, this cake has the power to save marriages. It is a highly sought after recipe and Reba has stunned me by posting it on the blog for everyone to enjoy.  You can have it by clicking HERE


UndertheTableandDreaming


The Girl Creative

Sunday's Best Linky Party!

For more Table tops, click Here


Wednesday, December 14, 2011

RE-cycling: Sunburst Mirror Tree Topper Craft

This tree topper is made from a recycled compact mirror, an old CD, skewers, recycled cereal box, sequins, gold paint & hot glue.   It cost me about 30 minutes and ZERO DOLLARS to make because I had everything already.

INSPIRATION GOAL:  I saw this Sunburst Mirror Tree Topper in Ballard Designs catalog for $75 and I was thinking about getting it because we had just bought a large sunburst mirror for our family room from Wisteria which we really like.  I hesitated to get it and didn't think about it again until we were already putting up our Christmas tree. By then I would have had to pay for expedited shipping costs to use it in time and I already thought the price was a bit high for what it was so I needed a crafty solution.

A SLIGHTLY EASIER VERSION TO MAKE:  I googled sunburst mirror ornaments and I found this one which I thought seemed easier to make.  This was what I used as a design template when I started the project. 
RE-CYCLING FOR CHRISTMAS:  I linked to this tree topper made from cereal box on a previous entry on using recycled items for Christmas decor and gift wrapping.  It gave me the idea to use cereal box for my sun form. If you want to see the entry you can find it HERE

RECYCLING CDs:  I happen to have a bunch of old computer cds around so I took note of this project by Lindy cottage hill making Christmas ornaments out of them.   They were also linked to in my Recycling for Christmas entry.

Image and craft by Lindy cottage hill

 A LOT of bloggers have made DIY sunburst mirrors using skewers.   It is sorta a bandwagon at this point. I'm only going to link to a few because it would be too hard for me to track down all the different ones I've seen on blogs.  Seriously, there are probably hundreds of blog entries on people making DIY sunburst mirrors with skewers.  Google will give you plenty of results, but here are a few projects I've seen.

http://mylittlehappyplace.blogspot.com/2010/03/diy-sunburst-mirror.html
http://leahkarch.blogspot.com/2010/05/diy-sunburst-mirror.html
http://ourbluefrontdoor.blogspot.com/2011/11/diy-mirror-sunburst.html
http://www.greenyourdecor.com/4789/tale-tutorial-sunburst-mirror/
http://catiescorner2.blogspot.com/2011/05/diy-sunburst-mirror.html

I already had the stuff to make the tree topper. I used skewers, cardboard from a recycled cereal box, an old CD, sequins (I'm not sure why we had it, but it was in my craft box), cardstock paper, gold paint, hot glue and scissors.

The white piece of paper is a template I made to make a single ray of the sunburst.  I figured out what size I wanted it to be, measured a half inch for each angle and then drew it on a piece of recycled cereal box.

I had gold metallic paint left over from a shield making craft for my daughter's Percy Jackson birthday party.  I took the mirror out of an old powder compact I hadn't thrown away yet and I pulled out an old cd.  I set aside the mirror because it is the only piece not painted gold.


After cutting out the cereal box form, I took it, some cardstock, 2 cds, skewers and sequins and put them all in a box to spray paint them gold.

I used my hot glue gun to glue the now painted skewers to the piece of cereal box I had cut out in the shape of a sun.  I glued the gold painted cd on top of them.  I attached the mirror to the cd to cover up the middle hole and then I put a ring of hot glue around the mirror to hold a ring of sequins around it.  The ring of sequins is what makes it look like an ornament instead of a kid's school project to me.  I then used the metallic acrylic paints, including one that had a copper tone to it, to add some shadows/low lights to the sun form and the cd.  The last step was to hot glue on the card stock in the form of a cone to use as a stand for the sunburst mirror ornament.  Above is the finished product on the tree.


The sunburst ornament needed the skewers for the size.  If I had just done the sunburst in my second inspiration picture, then the ornament would have been too small for the size of the tree.   The "rays" made out of skewers gave it the scale for the size of the tree. For something like this, how long the skewers should be depends upon how big a tree it will sit atop.  A larger tree will need a larger scale ornament/tree topper.  It was pretty easy though to make and everything is free or costs very little to make so if the first one comes out too small you can make it into a tree ornament and easily make a bigger version for a tree topper.  If you don't have an old compact, I've heard dollar stores sell round mirrors. Skewers are $1 for 100 and this project only took 40.  I used a handful of sequins from a $1 packet so figure $2-$2.50 max for those supplies.   Since I've never seen the Ballard Designs version in person, I cannot say if I would like it much more, but I do not think I would like it $75 more than something I made so easily at NO COST to me except 30 minutes of time.
Thanks for visiting the blog.  If you enjoyed the craft, we would really appreciate a comment on it.  We are new bloggers so getting feedback on our posts is very encouraging and helpful to us.

Happy Holidays.

Written by Eldarose

See more Christmas homes at the Home Tour by clicking HERE

This post is linked to Centsational Girl's Holiday Crafts party. See more Holiday crafts HERE

Photobucket


The DIY Club