Showing posts with label recipe. Show all posts

Tuesday, January 10, 2012

RE-ceiving Guests: Peter Rabbit Pty & Easter Playdate

FIRST BIRTHDAY:  For our daughter's 1st birthday we chose a Peter Rabbit theme.   As a new parent, I wanted to make things easy on me but still cute for the guests so I ordered the cake from a local bakery.  I think they did a great job decorating the cake.  It was half carrot cake, half white cake.

HOW SWEET IT IS.  Our daughter ate cake with her hands and took some cute pics and that is all I hoped for. The First Birthday party is more about adult guests since children that young cannot do much and will not even remember the party.  Our entertainment was a bubble machine.  That's it.  I had a pinata for the older kids to hit, but the weather didn't cooperate.  It rained the whole day so the pinata was saved for another time.
The Theme came about because I saw a Peter Rabbit party book in a book store.  It had cut outs to tie to make a banner and make little party hats for the guests.  I decided to use some of the cut outs to tie with ribbon and hang from the chandelier over our dining room table that would have the buffet for the party.  I used other cut outs on the table. I also copied images online to make labels I put next to different dishes to claim them as part of a theme. For example, next to the veggie platter, I put a sign saying Vegetables from Mr. McGreggor's Garden.   I couldn't find the book I originally used for this post, but Amazon does have a similar Peter Rabbit book. HERE

THE INVITE. This was the biggest project I did for the party.  We took pictures of our daughter with a Peter Rabbit doll we bought and some veggies.  Then I used the picture to make the birthday party invitations.  My mom still had her party invitation saved so Reba scanned it for me to post.  The scan wasn't done level and  I know the picture is not the best quality but if  you can tell that the invitation has a vellum overlay and it is cut out in the shape of the number "1" then that is all that matters.  We also used our daughter's photo for her Madeline birthday invite, you can see HERE.
INVITATION CRAFT:  To make the party invitations, you will need white card stock, vellum paper, scissors, a hole punch, a scanner, ribbon and white envelopes.  First, I scanned in our daughter's portrait and printed out 2 images to a regular sheet of paper.  I printed out sheets until I had enough to make all the invitations.  Second, I free hand drew a large number "1" as you can see above.  I experimented to both center it and make it large enough so the number captured all the good parts of the photo.  When I did this, I then cut out the number to use as a template.  Third, I typed all the party info in a word document and printed it out on vellum paper.  Fourth, I used a sharpie and the template to draw 2 number "1" outlines on the vellum sheets over where the 2 photo images would be on the sheets I already printed.   Fifth, I worked altering the text centering and printing it on that same vellum page with the outline until the text was centered within the outlined numbers I had drawn on it.   Sixth, I printed out vellum sheets with the party info on them, drew the number "1" outlines and cut out them out.   Seventh, I attached the two sheets, cutting them out based upon the outline of the number "1". Last, I punched a hole in the 2 sheets (vellum and the photo) and tied a blue ribbon on top.  The process was a little bit of time and effort, but I got a lot of compliments on the invitation so it was worth it to me.  There may be an easier way to do it using the computer to draw the outline before printing, but with my limited techno-knowledge, that was how I did it.  

PARTY MENU

Vegetables from Mr. McGreggor's Garden (veggie tray with dips)
Mrs. Rabbit's Muffins & Breads (blueberry muffins & buns to make ham sandwiches)
Mopsy, Flopsy & Cottontail's berries (bowl of mixed berries)
Mrs. Rabbit's Ham (sliced ham with different mustards so people can make small sandwiches)

Mrs. Tittlemouse's cheese (platter with some gourmet cheese and sliced cheese for the sandwiches)
Mrs. Tiggy-Winkle's tea (iced)


If you notice, it is a cold menu. I didn't heat up anything to serve. I normally offer some hot dishes to guests, even when I want to keep things simple, but with a new baby, I put simplicity first.  I found some carrots at the grocery store that were uncut with stems and placed a few on the table as decorations. I placed Beatrix Potter dolls which my friend, Jana, lent me,  on doll chairs in the middle of the food table as a centerpiece.


BIG SMILES:   My husband and daughter pose for a picture in front of the mantel in our old house. You can see that I used more of  the large collection of Beatrix Potter dolls which my friend, Jana, lent me to set up a mantel display for the party.  I also bought a lot of blue, light blue and white balloons and relied upon the large Peter Rabbit Pinata for a festive party setting. My parents gave us the pinata.  They bought it from a man in our home town. They brought us one in the shape of the Eiffel Tower for our daughter's Madeline Birthday Party, too.  Unfortunately, it rained all during the party so we couldn't use it.  I had to save it for another time and my friend, Martha, suggested I use it for an Easter time playdate, which is what we did. 
FINALLY BREAKING THE PINATA:  My daughter is finally getting her chance to break open the pinata above.  I hosted a party in March (several months after my daughter's birthday) for the specific purpose of finally using the Peter Rabbit pinata.

SPRING AFTERNOON SNACKS.  I wanted to do something a bit fun for the Spring playdate so I set up my outdoor table with a nice, crisp white linen table cloth, used pink depression glass serving pieces I have and some Pottery Barn Easter Egg plates to set up a sweet table.  The moss standing Rabbit is something I bought at a local gift store and decided to use as the table centerpiece.By this time, stores were selling plastic Easter eggs, so I bought some iridescent ones and just threw them around the table and the yard.
ANOTHER VIEW OF THE TABLE. I bought cupcakes, cookies, a fruit tart and pink French lemonade for the play date.
FRESH STRAWBERRIES,ROQUEFORT GRAPES AND FINGER CHICKEN SALAD SANDWICHES ON DISPLAY.   I cut up strawberries and made chicken salad sandwiches and Roquetfort grapes.  You can find a chicken salad recipe for the sandwiches HERE.  The Roquefort grapes were for the moms. The kids wouldn't have liked them.  I like how Roquefort grapes mix the sweet taste of the chilled grapes and the strong flavors of the cheese and nuts.   If you have never tried them,  I am sharing how to make them here.  

ROQUEFORT GRAPES

1 package chopped walnuts
1 package light cream cheese 8 oz. 
1/8 lb. Roquefort cheese
2 tablespoons heavy whipping cream
1 package red grapes (seedless)

Before opening up the walnut package,  I usually hit it a few times to smush up the pieces even more. Then, I open the bag and put all the nuts in a bowl.  Also, I set up a platter or plate nearby to place the finished grapes. Let the cream cheese and the Roquefort cheese become room temperature.  You are going to combine them with the whipping cream, and the cream cheese blends more easily the longer it is out.  You add in the cream to help the cheese become moist enough to coat the grapes.  I normally just use a spoon to mix the cheese with the cream, but you could also use a food processor for this.  Once you have mixed the cheeses and the whipping cream, then you will take a clean, dry grape and put it in your hands.  You will grab some of the cheese mixture, too, and roll the grape into the cheese mixture until it is thoroughly coated. Then you will roll the cheese-covered grape in the bowl with the nuts to coat it.  Placed the now nut coated grapes on the platter/plate you set up nearby and after you fill the platter, put it in the refrigerator to chill for at least 45 minutes before serving.


CLOSE UP VIEW OF FOOD.
EVEN CLOSER VIEW OF STRAWBERRIES AND ROQUEFORT GRAPES.

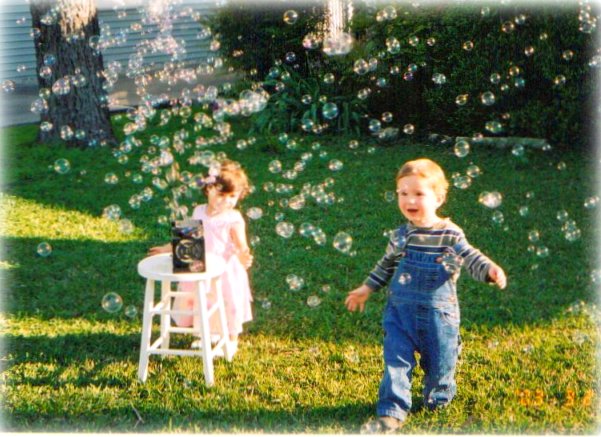
ENTERTAINMENT. For the playdate, I once again pulled out the bubble machine.  Seriously, the Bubble machine I bought was such a good investment. It kept the kids entertained long enough for the moms to sit down.
One more, because aren't they precious? Sigh. They grow up so fast.

WRITTEN BY ELDAROSE

Madeline or French themed Kids Party Ideas are  HERE


Dora the Explorer Party Ideas are HERE

LINK PARTIES:


;


Stuff and Nonsense
;


;
See more Tablescapes HERE


""/>

Tuesday, January 3, 2012

RE-ceiving guests: Western tablescapes

QUINTESSENTIAL TEXAS DINING:  BBQ, BEER & GOOD COMPANY.  This is a party my friends and I threw about 8 years ago for my next door neighbors who were moving back to California. They were California transplants and we had all become very close during their time in Austin so we wanted to give them a big ole Texas farewell to remember us by.  My husband and I set up a white tent in the front lawn, put a coir rug under it and set up a dinner party in our fenced in front lawn.  This worked out well since  we hoped other neighbors would join in if they were free.  A few extra actually did drop in to join the fun.  Above is the buffet table.  The galvanized blackboard is from Pottery Barn.  I still use it when I have people over for dinner outside.  My friend, Diane, brought over the wildflowers in cowboy boots wrapped with Texas bandanas to use as party table centerpieces   I used red and white checkered plastic tablecloths on all the tables.  I set one long table up for the buffet, another one for dinner, a small kids table and a card table as a drink station. For the meal, I made Texas Caviar (find the RECIPE HERE ) and got Poke-e-jo's a local BBQ restaurant, to cater the rest of the meal to make it easier.

GATEAU MARISA:  As I mentioned in my baby shower post  HERE, Gateau Marisa from Upper Crust Bakery in Austin is probably my favorite cake to serve at parties.  Since our departing neighbors had begun ordering the cake for their own parties, we got it for their going away party.  In case your Spanish is a little rusty, "Hasta Luego Amigos" means "Until later, Friends."
DINNER UNDER THE BIG WHITE TENT:  Here is a picture of the dinner set up in the front lawn.  I think you can tell folks ate, drank, chatted and enjoyed themselves.
SMILES ALL AROUND:  We were really lucky with our neighbors in our old house.  We all liked each other very much.  Later in the evening more neighbors dropped by to eat with us so the night became even more fun.  Obviously, it was a very casual dinner. We used paper plates and the plastic cups that Poke-E-Jos provides and people drank bottled beverages out of the bottle.  We wanted the clean up to be easy.
THE LITTLE PARTNERS' TABLE:   My friends and I all had kids the same age.  Something was in the water because we all got pregnant within 12 months of each other.  For the kids table, Diane brought over a mini version of the wild flowers in a cowboy boot centerpiece.  She used one of her son's cowboy boots for it.  The mini version was ADORABLE!  The table itself was my daughter's tea time play table covered with a plastic red and white tablecloth.  The moms took turns watching over the toddlers at the little partners' table so we could each get a break for a bit to eat in peace and talk to the adults. 
COOLING OFF:  The party was on one of the hottest days of the summer.  It was a sweltering heat and if you have ever been in Texas during the summer, you know how hot it can get here.  Even though it was an evening party, the sun was out for the beginning hour or so and it was super HOT.  I was so annoyed with myself for not putting out a misting fan for the party.  Our departing neighbors had one but theirs was already stored away  and I hadn't planned ahead to get one of my own in time for the party.  I leaned a lesson though and got one afterwards to have it for future outdoor parties and in Texas, they sure come in handy.    It was so hot, the little ones all went over to the beverage station to cool off.  On the table, I had a small galvanized tub full of Shiner beer and a pitcher of ice tea and below I had a big galvanized tub full of sodas and water.  The kids went straight for the ice.  You can also see above that I had blue, red  & Lone Star balloon bouquets set up to make the party more festive.
KIDS BEING KIDS:  The kids were so young, they didn't go for the water bottles to cool off.  They pulled out ice straight from the tub and started eating it that way.  The Dads watched and even photographed it with amusement until one of the moms decided it was not sanitary and made the kids stop.  I joined in with the other moms and I sincerely worried about the germs..  Later that night, I thought about how when I was a kid, I thought nothing about playing with mud pies, collecting bugs with my bare hands and drinking water straight from the water hose to cool off on hot days yet as soon as I became a mother, the idea of allowing my daughter to do any of those things freaked me out a bit.  Funny, isn't it?  If any of you ever rode in the back of a station wagon with a bunch of other kids with no seat belts on as a kid only to grow up and fret hard core about whether your child's car seat was installed correctly or not, then you'll know where I am coming from.   Things have sure changed.  One of the things I love about my inner circle of friends is that we remind each other to plan activities for our kids that are old fashioned kid fun. I am working on posts to share the kid parties we've had.  Hopefully, I will finish editing those soon.
VINTAGE WESTERN TABLESCAPE:  Above is a table setting that I am working on right now with vintage cowboy plates.  My mother-in-law gave my husband and me four of these vintage divided western bucking cowboy plates. I believe my father-in-law used them as a child. I found another 2 on ebay and I keep meaning to buy some more because I've been holding on to a Western Theme Murder Mystery Party Game that I would like to throw.  If you've never done one, they are very fun.  I have done a couple and I am hoping to do one this summer if I get more plates to set a table of 10.  I have red bandanas from Wal-Mart to use as napkins.  I made napkin rings from paper towel holders and twine.  The name cards are left over from the farewell party we gave our neighbors as is the plastic red and white checkered tablecloth. I plan on getting fabric tablecloths, but the plastic red & white tablecloths are still holding up. I have even used them for a couple of kitschy pizza parties with those woven Italian wine bottles they sell at grocery stores, some candles and plastic grapes.  I have never had plastic tablecloths last like these have.  They seem a little thicker than the ones they sell now though.  Maybe plastic tablecloths were produced better 8 years ago. It seems wasteful not to use them when I have them already so until they get too old to use, I won't be buying or renting the fabric tablecloths even though they are nicer.

KEEP IT CASUAL:  I loved how Diane put wildflowers in boots for the farewell party and plan on copying the idea for the Western theme Mystery Dinner party when I have it.  In Texas, it is pretty common to have western boots so I used one of my daughter's to set up a prototype centerpiece.  The flowers are just a bunch from the grocery store I picked up for $9.  I like fresh flowers so after taking these pics, I put them in our kitchen to liven it up.  For the photo, I put some rope, a horse shoe souvenir from a trip to a riding camp, a tin can decorated with gingham ribbon and raffia and a red bandana on a tray with the boot to be a centerpiece.  I didn't have enough flowers for the tin can and I might want to do something different with it (add old buttons to it, maybe?)  and I think I want the flowers to be more wild flowers because I liked how those looked when Diane did them.
WORK IN PROGRESS:   I am still working on the set up.  I will use a long table so there won't be as much empty space on it as on the one above.  I have been collecting/recycling pickle  jars to use for the drinks.  The silverware will be in the napkins.  I may add some chargers or place mats, but I haven't decided what kind might look good yet.  I want to keep it VERY low key and casual, but visually, I think it is nice for plates to have a frame on top of the tablecloth background.  If you have an idea, please share it in the comments. I could use some more inspiration. I have some western themed lights I need to remember to use when we do this party.  Do any of you do this, too, where  you plan to throw a party just because you have some stuff for it that you want to use?
RE-cycling:  I think recycling is very important and I want to incorporate it into my entertaining more.  I have begun collecting pickle jars to use as drinking glasses. I find they are a good size for it.  I have decorated the glasses I have collected thus far with raffia and some wood and silver beads that my daughter had in her bead collection.   I think it adds a cute extra little touch to the glasses.  I wrapped the glasses, threaded the beads on the ends of the raffia and then tied a knot to secure them.  I cut off the extra and ruffled up the ends a bit.

TEXAS CAVIAR:  I like to make Texas Caviar whenever we have BBQ or Mexican food dinner parties since it is so tasty and easy to make.  I also make it for New Years since Southern legend has it that eating Black eyed peas on New Years brings good luck.  We have a lot of margarita glasses so I plan on serving the Texas Caviar in individual margarita glasses with tortilla chips.  The recipe can be found HERE
RE-cyling & RE-crafting:  I cut up paper towel holders and wrapped them with twine from the Dollar store, securing it with hot glue.  It was very easy to make.  I made 6 in about 10 minutes.  I think they work for outdoor dinner parties.  I considered embellishing them with rustic metal pieces (bottle caps with the lone star images from The Lone Star State glued inside perhaps?) or with paper shapes, but I think they work fine as they are, too.

HOW THIS ENTRY BEGAN:  Reba sent me pictures of a Western Table she is using when she is out in the country and I decided I might as well scan in pictures of my own Western tables for the entry.  Above is Reba's simple country breakfast table setting. It includes blue bandana place mats, blue tin plates found on the internet set with copper charger plates purchased in Mexico years ago.  The Wallace Taos flatware is available thru the Wallace website or Horchow catalog often has it, too.  Reba likes the size and weight of the flatware.  It is scaled like European flatware which makes a nice complement to a rustic setting.
RUSTIC IN THE CITY VS. THE REAL THING:  My plastic red & white tablecloths are party store versions of country living.  My settings are too.  Above, Reba shows what the real deal often looks like.  When you are out in the country, the easiest and most practical centerpiece is a bowl of fruit that can serve as part of the meal.  Going to the country can be relaxing if you keep things simple.
THE BLUE COUNTRY TABLE:  Reba purchased the blue rim glass bowls and glasses in Mexico, but similar bowls and glasses are usually available at Pier One. 


I have a King Ranch Casserole recipe from Reba's inlaws' cook book that I plan on posting, but I will save it for another time when I have a photo to post with it. Hasta luego, amigos. Hopefully, it will be more hasta pronto if I have luck with the photo scanning/editing. 

WRITTEN BY ELDAROSE


Outdoor Dinner Party Post is HERE


""/>


;


Stuff and Nonsense


vif187


Chic on a Shoestring Decorating


;
See more Tablescapes HERE